Apache 的简介:
Apache 是企业中常用的 web 服务,用来提供 http://(超文本传输协议)。Apache 是世界使用排名第一的 Web 服务器软件。它可以运行在几乎所有广泛使用的计算机平台上,由于其跨平台和安全性被广泛使用,是最流行的 Web 服务器端软件之一。它快速、可靠并且可通过简单的 API 扩充,将 Perl/Python 等解释器编译到服务器中。同时 Apache 音译为阿帕奇,是北美印第安人的一个部落,叫阿帕奇族,在美国的西南部。也是一个基金会的名称、一种武装直升机等等。
2、支持多种网页编程语言
3、模块化设计 、运行稳定、良好的安全性
主配置目录: /etc/httpd/conf
主配置文件: /etc/httpd/conf/httpd.conf
子配置文件: /etc/httpd/conf.d/*.conf
默认发布目录: /var/www/html
默认发布文件: index.html
默认端口: 80
rpm -e httpd php php-mysql ##还原环境
rm -fr /var/www/
yum install httpd -y #安装阿帕启
systemctl start httpd #开启阿帕启
操作1:
netstat -antlup | grep 80 #查看端口
netstat -antlup | grep httpd

##说明阿帕奇的默认端口为 80
操作2:
cd /var/www/html #进入阿帕启的默认目录
vim index.html #编辑阿帕启的默认发布文件
################
<h1>hello world !!!</h1> #<h1> </h1> 表示字体
systemctl stop firewalld #必须关闭火墙,否则测试不到任何效果
测试:
在firefox 里输入 172.25.254.230 可查看到默认发布目录里的文件里的内容
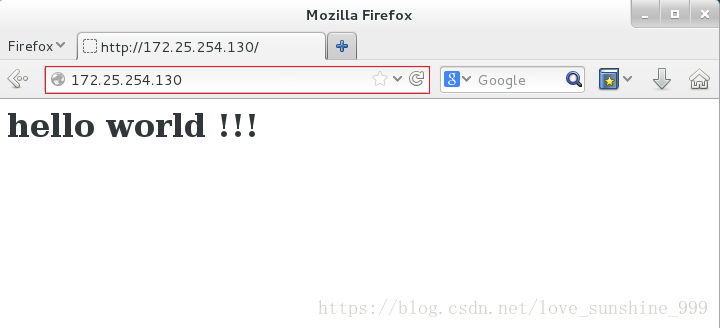
##说明阿帕奇的默认发布目录为/var/www/html 默认发布文件为 index.html
实验1:(更改默认端口)
实验:
netstat -antlup | grep httpd

vim /etc/httpd/conf/httpd.conf #编写阿帕启的主配置文件
############

systemctl restart httpd
netstat -antlup | grep httpd

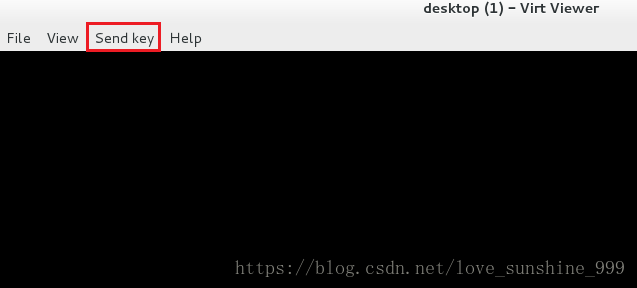
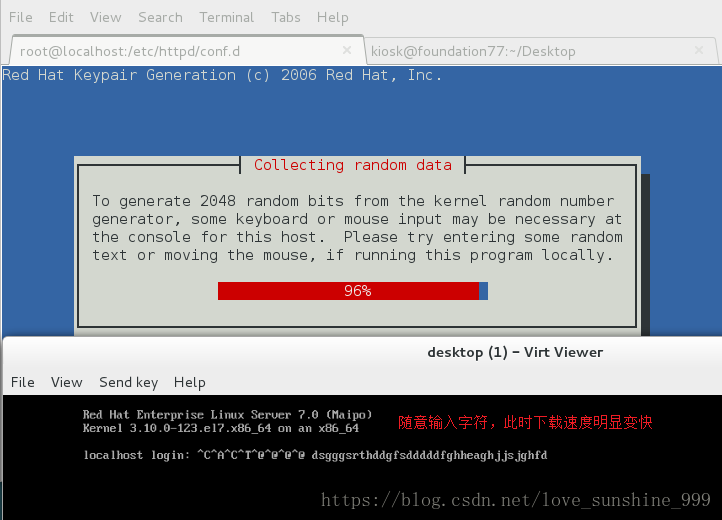
注意:如果重启时间很长就 点击view Desktop –> sendkey –> ctrl+Alt+F6 –> 敲键盘 生成字符
测试:
此时在firefox 里输入 172.25.254.230 无法查看默认发布文件里的内容
必须输入 172.25.254.130:8080/ 才能查看到,因为阿帕奇的默认端口为 80
而此时阿帕奇的端口已经被更改为8080

实验2:
(1)更改默认发布目录:
实验:
mkdir /westos/html
cd /westos/html
vim index.html
######
你好
vim /etc/httpd/conf/httpd.conf #编写阿帕启的主配置文件
##################
更改:
42 Listen 80 #改回默认端口
注释:
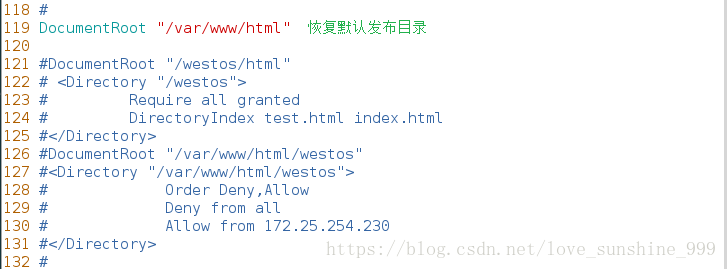
119 #DocumentRoot “/var/www/html”
添加:
120 DocumentRoot “/westos/html” #更改阿帕启的默认发布目录
121 <Directory “/westos”> ##授权
122 require all granted
123 </Directory>


systemctl restart httpd
测试:
在firefox 里输入 172.25.254.130 可查看到/westos/html 目录下 index.html 文件里的内容

(2)更改默认发布文件:
pwd
vim test.html
#####
test hello
vim /etc/httpd/conf/httpd.conf
#############
119 #DocumentRoot “/var/www/html”
120 DocumentRoot “/westos/html”
121 <Directory “/westos”>
122 require all granted
123 #添加 DirectoryIndex test.html index.html #排在前面的优先级高
124 </Directory>

systemctl restart httpd
测试:
在firefox 里输入 172.25.254.130 可查看到/westos/html 目录下 test.html 文件里的内容,因为 test.html 的优先级高于 index.html 所以默认先访问 test.html

2.两种访问控制
(1)基于 IP 的访问控制:
实验1(黑名单)
cd /var/www/html/
ls
mkdir westos
ls
cd westos/
ls
vim index.html
#####
westos linux
vim /etc/httpd/conf/httpd.conf
###########
注释
120 DocumentRoot “/westos/html”
121 <Directory “/westos”>
122 require all granted
123 DirectoryIndex test.html
124 </Directory>
添加
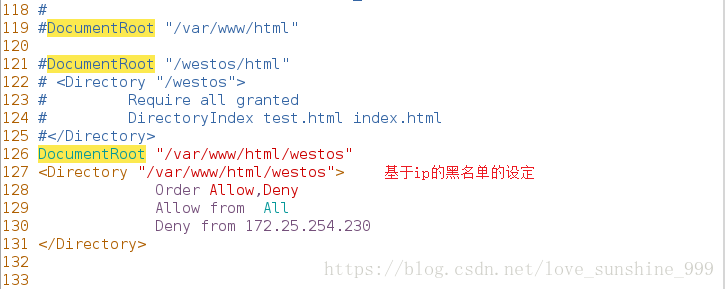
DocumentRoot “/var/www/html/westos” #更改默认发布目录
<Directory “/var/www/html/westos”>
Order Allow,Deny #Order 表示顺序,先记录 Allow 再记录 Deny
Allow from All #允许所有人访问
Deny from 172.25.254.230 #禁止 230 访问,相当于黑名单
</Directory>
systemctl restart httpd
测试:
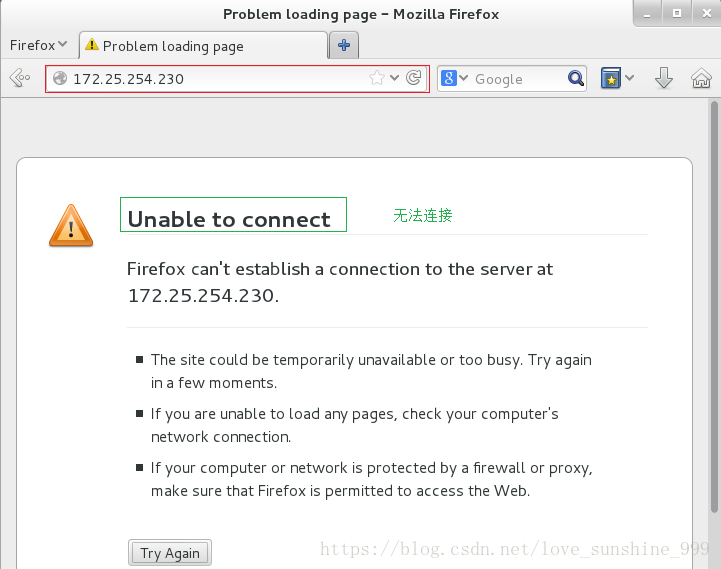
在firefox 里 输入172.25.254.230 不能访问,输入其他 ip 均可访问到 westos 文件里的内容

实验2(白名单)
vim /etc/httpd/conf/httpd.conf
###########
更改
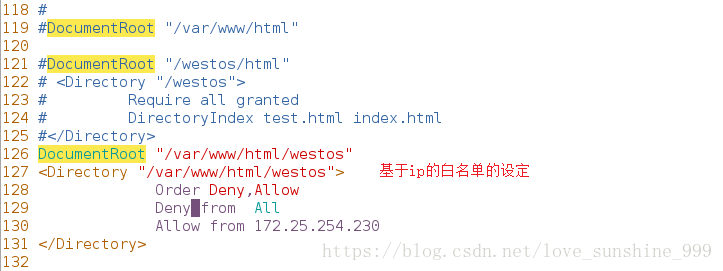
DocumentRoot “/var/www/html/westos”
<Directory “/var/www/html/westos”>
Order Deny,Allow #先记录 Deny,再记录 Allow
Deny from All #禁止所有人访问
Allow from 172.25.254.230 #允许 230 访问,相当于白名单
</Directory>
systemctl restart httpd
测试:
在firefox 里 只有输入172.25.254.230 才能访问访问到 westos 文件里的内容,输入其他 ip 均可不能访问
(2)基于用户的访问控制:
实验:
cd /etc/httpd/
htpasswd -cm apacheuser joe #建立 joe 用户
cat apacheuser

vim /etc/httpd/conf/httpd.conf
#################

systemctl restart httpd
测试:
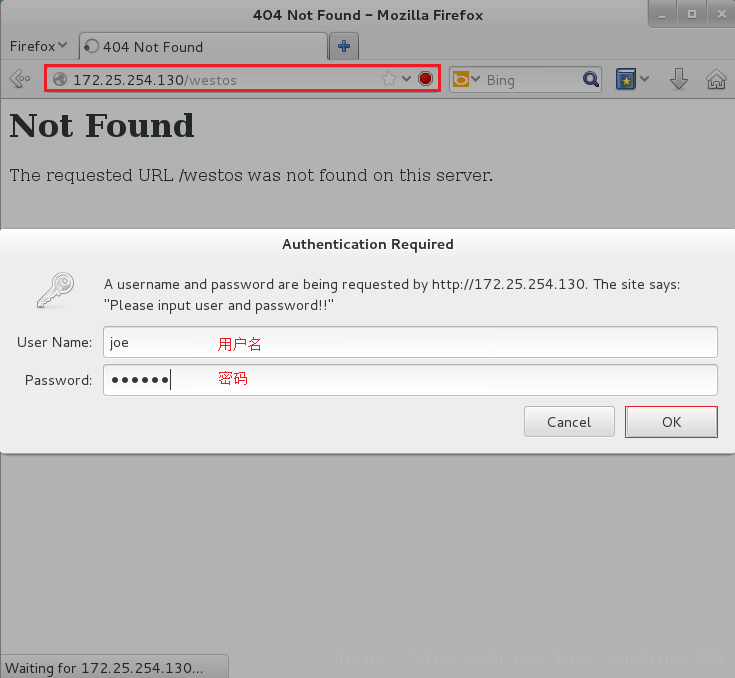
在firefox 里输入 http://172.25.254.130/westos/
用户密码登陆成功后便可以查看到 westos 文件中的内容

3.Apache 的虚拟主机配置
##用一个 ip 发布多个测试节点,使不同的域名访问不同的文件
实验:
在虚拟机中:
vim /etc/httpd/conf/httpd.conf
############
取消注释
119 DocumentRoot “/var/www/html” ##还原环境
注释基于ip 访问控制的所有操作
cd /etc/httpd
ls
cd conf.d/
ls
vim default.conf
##########

ls /var/www/
mkdir /var/www/virtual/westos.com/music -p
vim /var/www/virtual/westos.com/music/index.html
##############
<h1>music’hello</h1>
mkdir /var/www/virtual/westos.com/news -p
vim /var/www/virtual/westos.com/news/index.html
#################
<h1>news’ hello</h1>
vim news.conf
################

cp news.conf music.conf
vim music.conf
#################
<h1>music’hello</h1>
在真机中
su –
vim /etc/hosts
##############

测试:
在真机的firefox 里 输入http://www.westos.com 出现 hello word!!!

输入news.westos.com 出现 news’ hello

输入music.westos.com 出现 music’hello

3.证书的制作,并指定证书
实验:
yum install mod_ssl -y
yum install crypto-utils -y
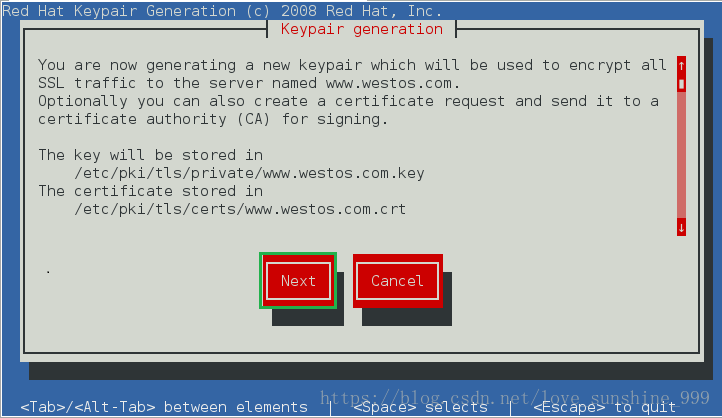
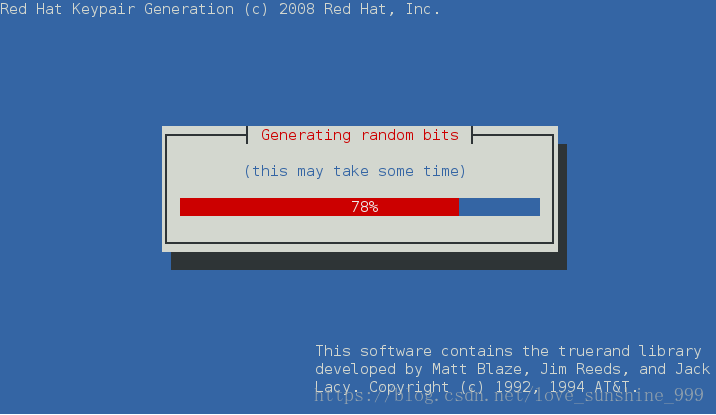
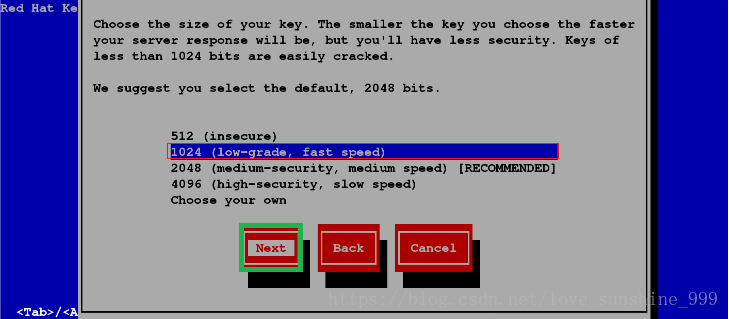
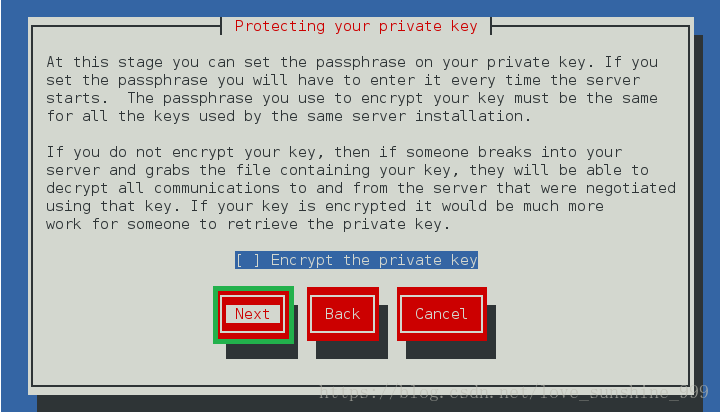
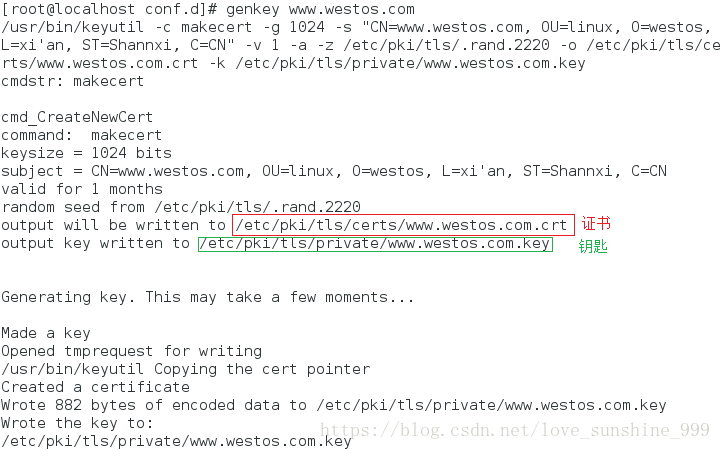
genkey http://www.westos.com



ls
vim ssl.conf
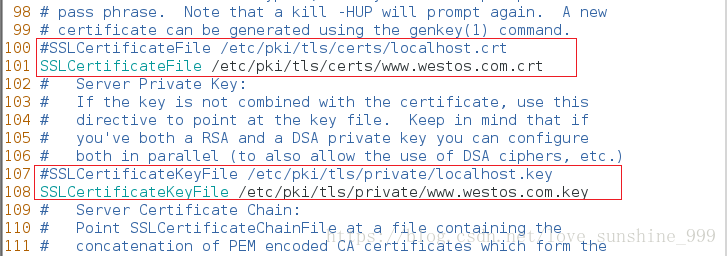
############
注释: 100 #SSLCertificateFile /etc/pki/tls/certs/localhost.crt
添加: 101 SSLCertificateFile /etc/pki/tls/certs/www.westos.com.crt
注释: 108 #SSLCertificateKeyFile /etc/pki/tls/private/localhost.key
添加: 109 SSLCertificateKeyFile /etc/pki/tls/private/www.westos.com.key
systemctl restart httpd #必须重启,否则测试会出现问题
测试:
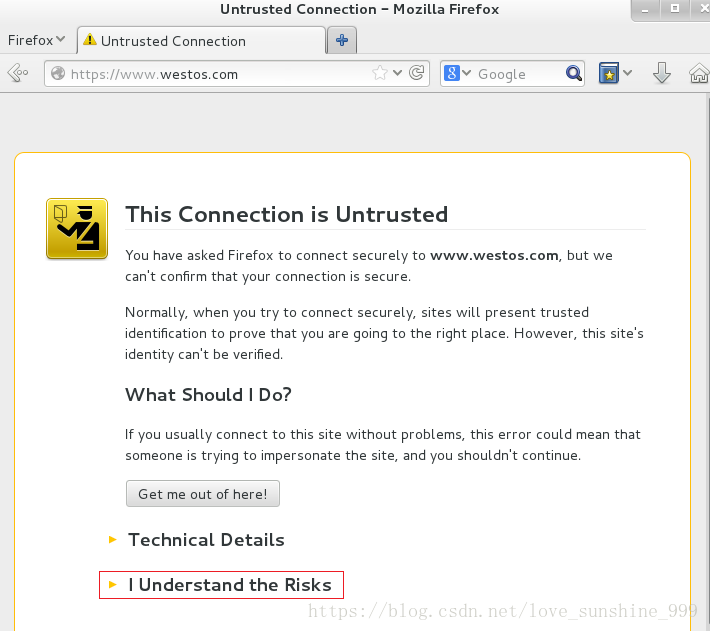
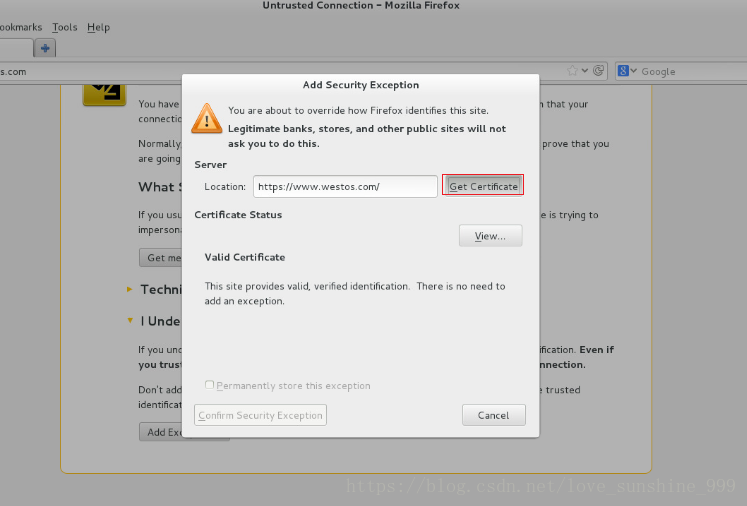
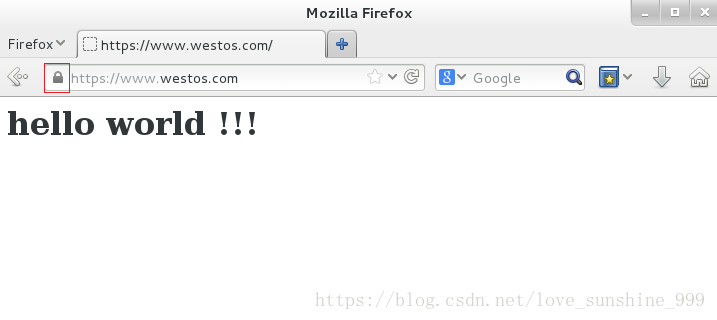
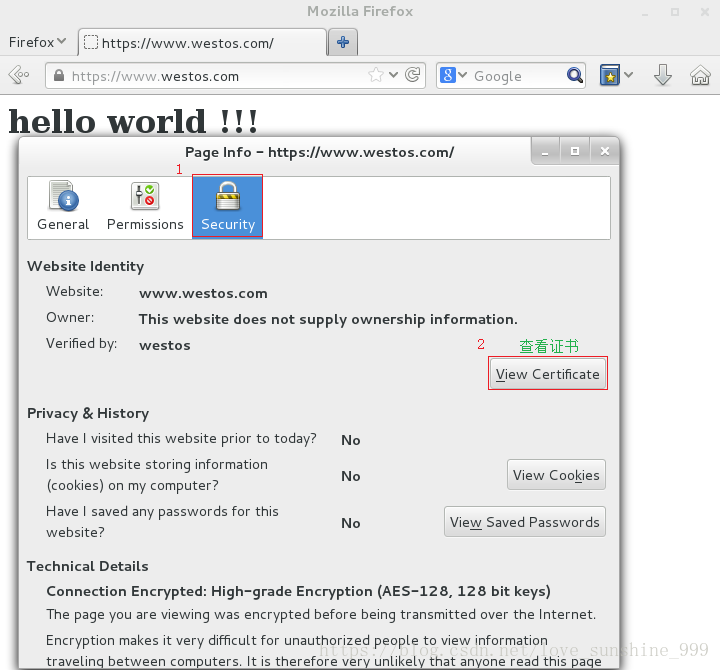
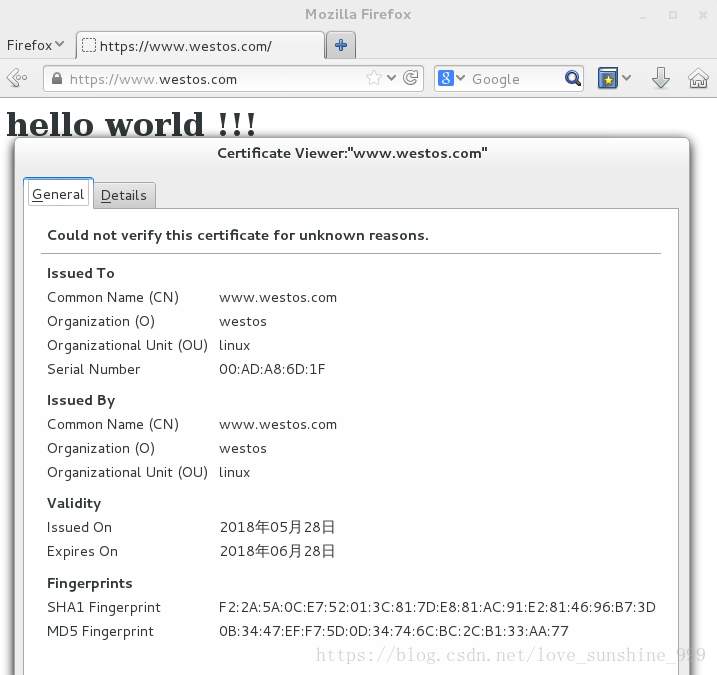
在firefox 里输入 https://www.westos.com/
会进入下载证书界面,下载好后便可查看到自己的证书
4.构建虚拟 WEB 主机(http—>https)
实验:
cd /etc/httpd/conf.d/
ls
cp news.conf login.conf
vim login.conf
##############
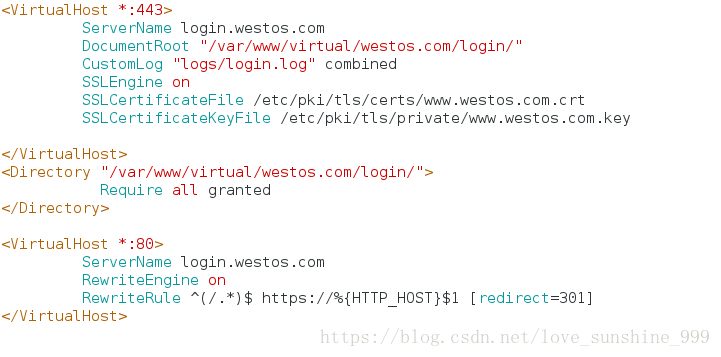
修改
<VirtualHost *:443>
ServerName login.westos.com
DocumentRoot “/var/www/virtual/westos.com/login/”
CustomLog “logs/login.log” combined
SSLEngine on
SSLCertificateFile /etc/pki/tls/certs/www.westos.com.crt
SSLCertificateKeyFile /etc/pki/tls/private/www.westos.com.key
</VirtualHost>
添加
<Directory “/var/www/virtual/westos.com/login/”> #给权限
Require all granted
</Directory>
<VirtualHost *:80> #自动转换为 https
ServerName login.westos.com
RewriteEngine on
RewriteRule ^(/.*)$ https://%{HTTP_HOST}$1 [redirect=301]
</VirtualHost>
# ^(/.*)$ 表示客户端在 firefox 输入的所有字符
# https:// 表示自动转换为 https(临时转换:只在访问 login 时做转换)
# %{HTTP_HOST}$1 [redirect=301] 表示客户端在 firefox 输入的除 http//:以外的所有字符
systemctl restart httpd
mkdir /var/www/virtual/westos.com/login/ -p
vim /var/www/virtual/westos.com/login/index.html
#################
<h1>login’hello</h1>
测试:
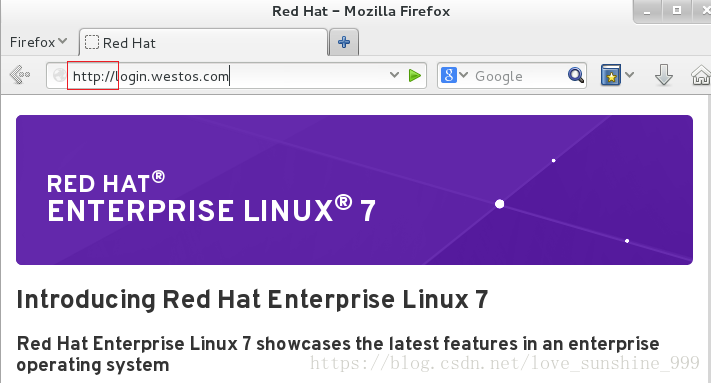
在firefox 里输入 http://login.westos.com 或者 login.westos.com
会自动转换为https:// 并且会显示文件的内容 login’hello


注意:如果测试出现问题,有可能是访问次数过多造成的,此时需要清除历史记录,再刷新即可
5.Apache 支持的语言
1. php
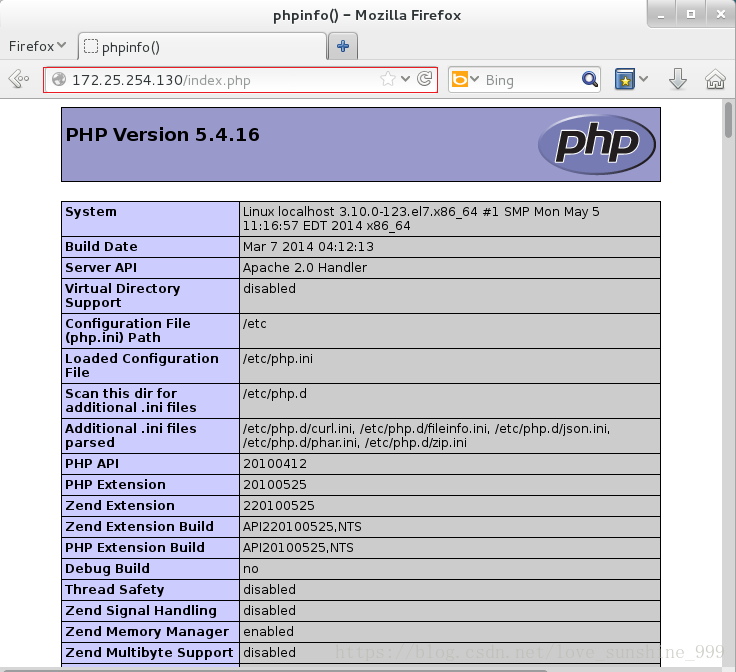
实验:
cd /var/www/html
vim index.php
############

yum install php -y
systemctl restart httpd
测试:
2. cgi
实验:
ls
mkdir cgi
ls
vim cgi/index.cgi
#################

chmod +x cgi/index.cgi #给脚本一个执行权限
./cgi/index.cgi #执行脚本
ls
cd /etc/httpd/conf.d/
ls
vim default.conf
################

systemctl restart httpd
测试:
在 firefox 里 输入 http://172.25.254.130/cgi/index.cgi 会出现执行 date 命令的结果

6.论坛的制作
实验:
cd /var/www/html
yum install php-mysql -y
systemctl restart httpd #必须重启,否则不生效
systemctl start mariadb
ls
##下载 Discuz_X3.2_SC_UTF8.zi
[root@dns-servser html]#lftp 172.25.254.250
lftp 172.25.254.250:~> ls
drwxr-xr-x 2 0 0 4096 Nov 14 2017 CSA 文档
drwxr-xr-x 4 0 0 4096 Oct 02 2016 docs
drwxr-xr-x 21 0 0 4096 Mar 20 08:17 pub
-rw-r–r– 1 0 0 282 May 10 06:42 show.sh
lftp 172.25.254.250:/> cd /pub
lftp 172.25.254.250:/pub> ls
-rw-r–r– 1 0 0 12486177 Aug 25 2016 Discuz_X3.2_SC_UTF8.zip
drwxr-xr-x 7 0 0 73 Jun 24 2016 Enterprise
drwxr-xr-x 2 0 0 117 Jun 04 2017 RHCEDOCS
drwxr-xr-x 4 0 0 4096 Mar 29 04:37 RHCEPACKAGES
-rwxr-xr-x 1 1000 1000 103486240 Apr 28 2015 Student_2.7.13058.exe
drwxr-xr-x 2 0 0 4096 Mar 18 09:19 WESTOS_SHELL
-rw-r–r– 1 0 0 138 Sep 16 2017 clear.sh
drwxr-xr-x 10 0 0 105 Jun 12 2016 doc
drwxr-xr-x 13 1000 1000 4096 May 26 02:57 docs
drwxr-xr-x 3 1000 1000 4096 Nov 26 07:58 exam
-rwxr-xr-x 1 0 0 18928 Sep 17 2016 foundation-config-7.0-1.r26059.x86_64.rpm
-rwxr-xr-x 1 0 0 1053 Nov 14 2017 hostset
-rw-r–r– 1 0 0 1411 Mar 20 08:17 hostset.sh
drwxr-xr-x 2 0 0 4096 Jan 19 06:07 iso
drwxr-xr-x 2 0 0 53 Oct 31 2015 linuxmedia
-rw-r–r– 1 0 0 3018 Dec 29 09:14 markdown
drwxr-xr-x 3 0 0 18 Mar 01 2016 media
-rw-r–r– 1 0 0 2684 Jun 24 2017 pxe-install
drwxr-xr-x 2 0 0 22 Apr 26 2016 python
-rw-r–r– 1 0 0 104208 May 19 2017 rhce 考试说明.pdf
-rw-r–r– 1 1000 1000 116455 May 12 2017 rhcsa 考试说明.pdf
drwxr-xr-x 2 0 0 38 Nov 26 2015 rhel6
drwxr-xr-x 2 0 0 6 Sep 24 2015 rhel6.5
drwxr-xr-x 2 0 0 6 Nov 19 2015 rhel7.0
drwxr-xr-x 2 0 0 6 Jan 27 2016 rhel7.1
drwxr-xr-x 2 0 0 6 Jul 25 2016 rhel7.2
-rw-r–r– 1 0 0 216 May 12 2017 rht
-rw-r–r– 1 0 0 1113 Nov 12 2017 rpmbuild
drwxr-xr-x 2 0 0 4096 Nov 26 08:01 shellexample
drwxr-xr-x 4 0 0 4096 May 26 03:11 software
-rw-r–r– 1 0 0 397 Aug 25 2016 webapp.wsgi
-rw-r–r– 1 0 0 397789 Feb 06 06:37 westos.png
-rwxr-xr-x 1 0 0 117 Sep 24 2015 x11vnc
-rw-r–r– 1 0 0 85 Sep 16 2017 yum.repo
drwxr-xr-x 5 0 0 46 Jun 20 2017 论坛模板
-rw-r–r– 1 0 0 696 Sep 05 2017 部署论坛
lftp 172.25.254.250:/pub> get Discuz_X3.2_SC_UTF8.zip
12486177 bytes transferred
lftp 172.25.254.250:/pub> quit
[root@dns-servser html]# ls
cgi Discuz_X3.2_SC_UTF8.zip index.html index.php westos
[root@dns-servser html]# unzip Discuz_X3.2_SC_UTF8.zip #解压
若用 u 盘已经将 Discuz_X3.2_SC_UTF8.zip 拷贝到桌面实验该怎么做:

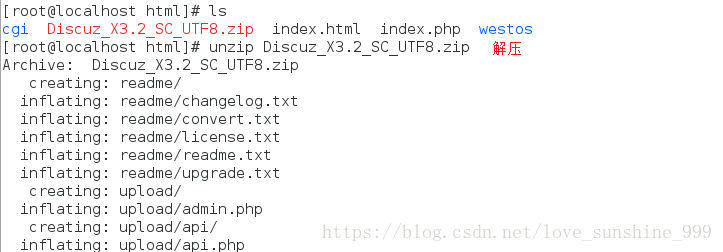
chmod 777 /var/www/html/upload/ -R
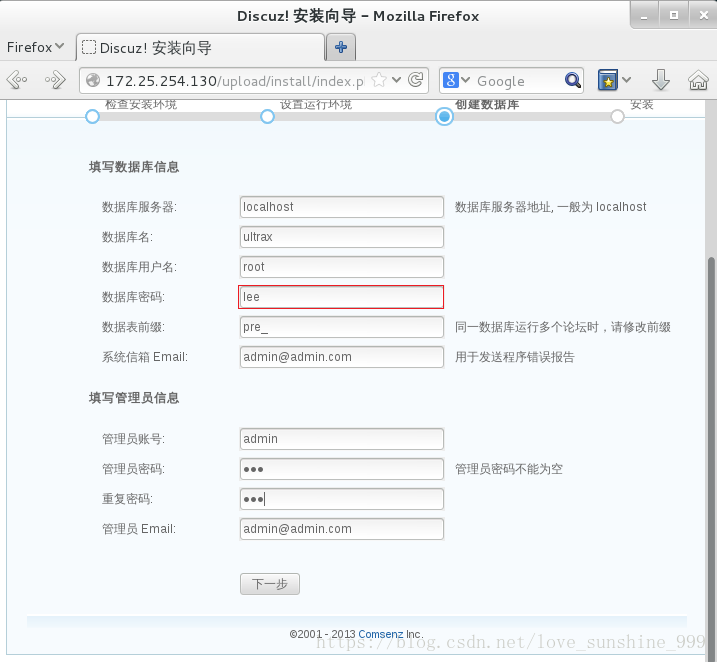
测试:
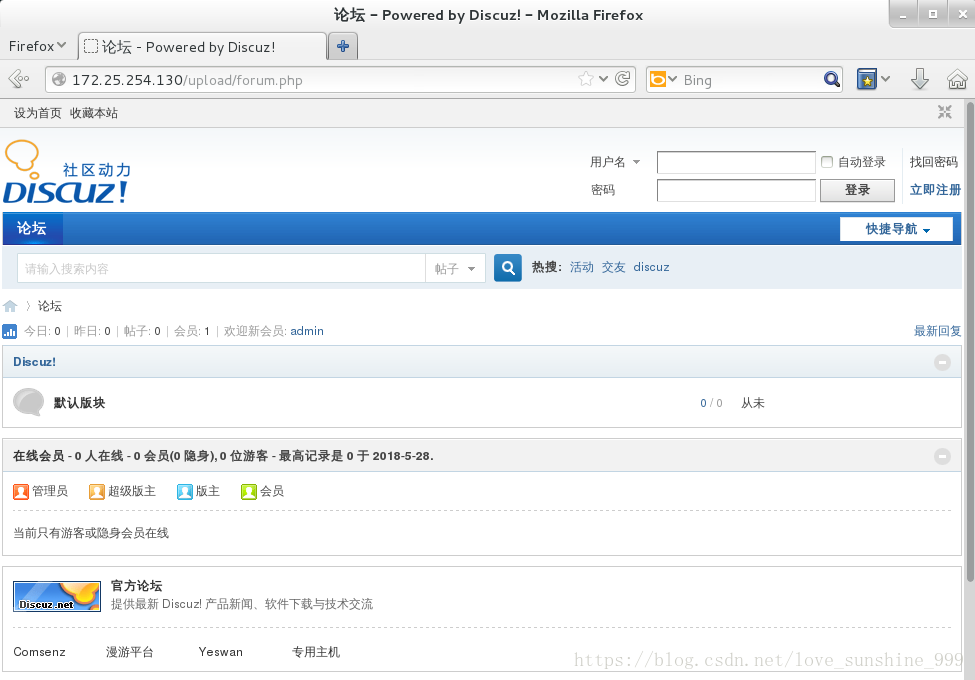
在firefox 里输入 172.25.254.130/upload/install/ 便可进入安装论坛的界面


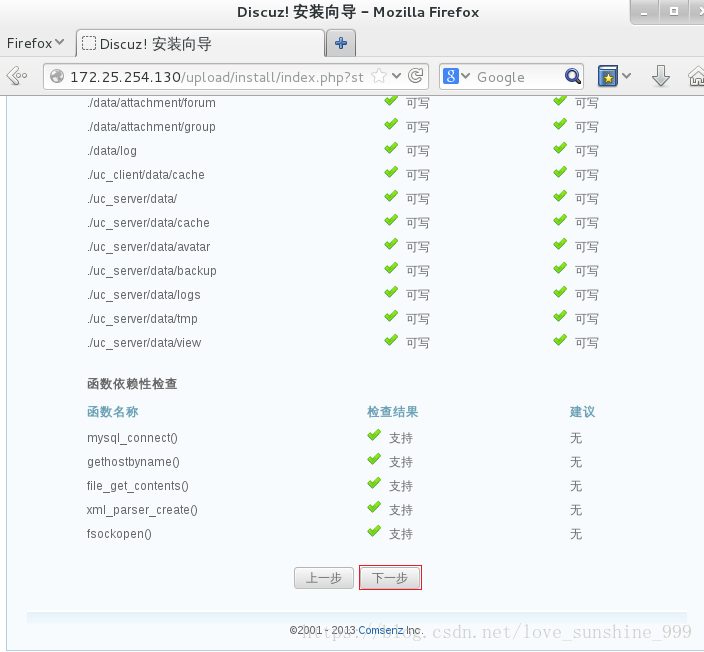
##如果出现不支持,可能是忘记重启 Apache




7.正向代理(真机–>虚拟机 desktop)
虚拟机可以上网,但真机不能上网
虚拟机访问页面信息存储 让真机去访问虚拟机缓存的信息,便可访问网页
实验:
在虚拟机中:
vim /etc/sysconfig/network-scripts/ifcfg-eth0
###############
添加
BOOTPROTO=none
IPADDR=172.25.254.130 #虚拟机 ip
NETMASK=255.255.255.0
GATEWAY=172.25.254.250
DNS1=114.114.114.114
systemctl restart network
ping http://www.baidu.comPING #虚拟机可以上网
*****************************
http://www.a.shifen.com (220.181.111.188) 56(84) bytes of data.
64 bytes from 220.181.111.188: icmp_seq=1 ttl=53 time=29.2 ms
64 bytes from 220.181.111.188: icmp_seq=2 ttl=53 time=29.9 ms
^C
— http://www.a.shifen.com ping statistics —
2 packets transmitted, 2 received, 0% packet loss, time 1001ms
rtt min/avg/max/mdev = 29.266/29.612/29.959/0.386 ms
在真机中:
ping http://www.baidu.com #真机不能上网
************************
connect: Network is unreachable
此时在真机firefox 里输入 www.baidu.com 不能打开网页
在虚拟机中:
yum install squid -y
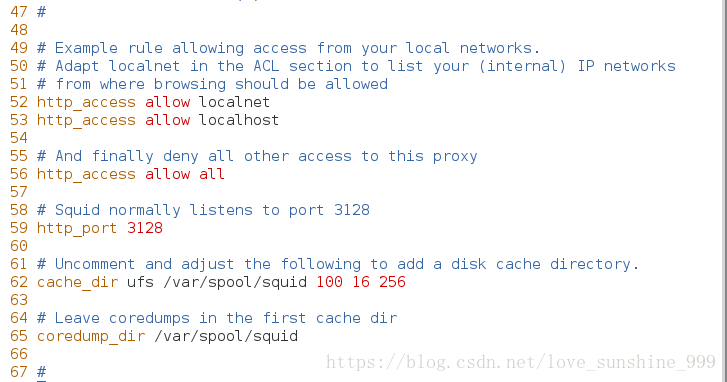
vim /etc/squid/squid.conf
######################
更改
56 http_access allow all
取消注释
62 cache_dir ufs /var/spool/squid 100 16 256
systemctl restart squid
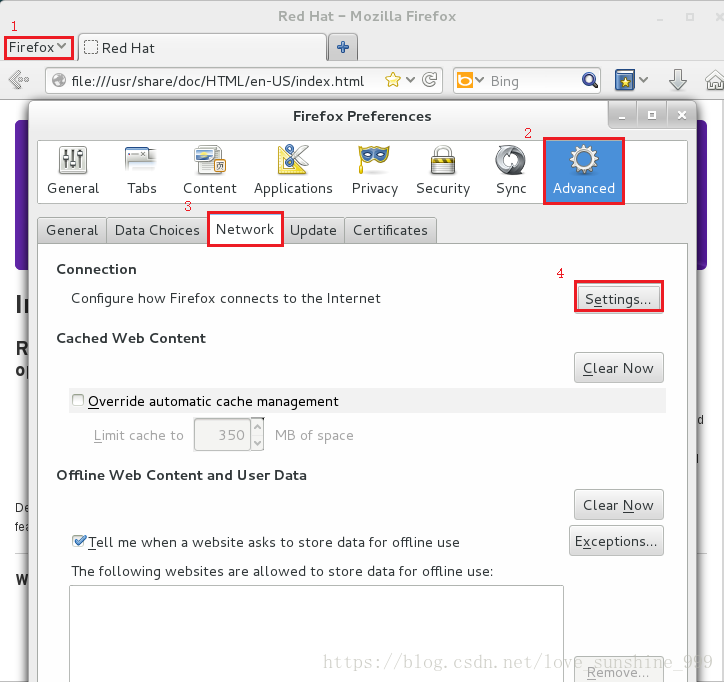
在真机的firefox 里 :
preferences–>addvanced–>network

测试:
在真机里 ping 不通,但此时在firefox 里输入 www.baidu.com 可以打开网页,因为虚拟机访问过网页后记录里网页信息,真机通过访问虚拟机获得网页信息,便可实现无网络状态下访问网页。
8.反向代理(真机—>server—>desktop)
在deskop 里
更改主机名hostnamectl set-hostname shenzheng.example.com
yum install httpd -y
在server 里
更改主机名 hostnamectl set-hostname xian.example.com
yum install squid -y
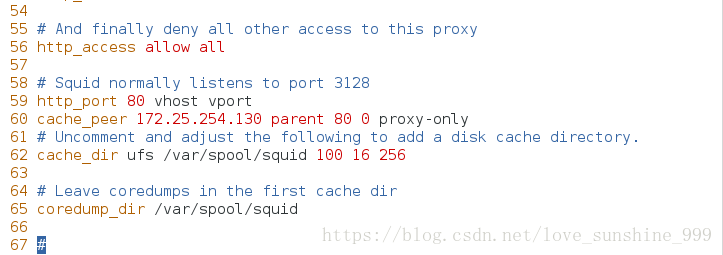
vim /etc/squid/squid.conf
####################
更改
56 http_access allow all
添加
59 http_port 80 vhost vport
60 cache_peer 172.25.254.130 parent 80 0 proxy-only
取消注释
63 cache_dir ufs /var/spool/squid 100 16 256
测试:
在真机中的firfox 里 :
删除上一步 在preferences–>addvanced–>network 里操作
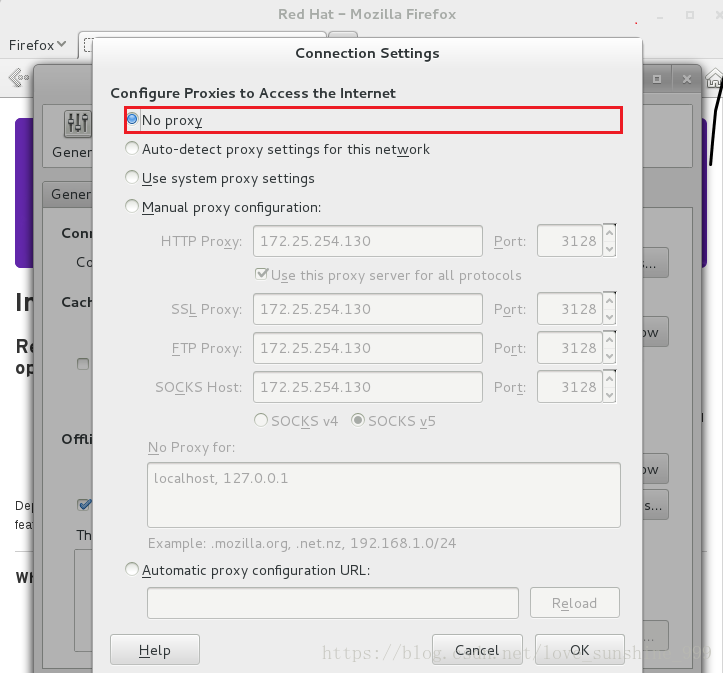
输入 172.25.254.230 便可访问到 130 里默认文件里的内容
注意:如果测试出现问题,可能是server 里的火墙没有关闭,
原文始发于:Apache 服务配置
相关文章
- Anaconda所有历史版本下载(0)
- ThinkPad x13 Gen1傲腾H10重装系统的麻烦(0)
- Win10系统电脑进入安全模式的四种方法,让你轻松应对各种问题(0)
- 使用Jetson_benchmark进行性能测试(0)
- 【Python】修改Windows中 pip 的缓存位置与删除 pip 缓存(1)


